Turning weeks of spreadsheet work into a few hours, that’s the difference DreamTimetable makes for school scheduling. If you’ve ever built a timetable by hand, you know the drill: juggling dozens of notes and spreadsheets, double and triple checking for overlaps, trying to keep every teacher and class satisfied, and then a new cohort gets added three days before the school year starts and everything has to be redone.
If that sounds familiar, DreamTimetable is built for exactly this problem. After speaking with dozens of schools and consulting with scheduling experts, we’ve put together what we believe is the easiest and most intuitive way to build a schedule. Below, we’ll walk you through creating your first one. If you find this useful, consider booking a free call with one of our customer support specialists to see how DreamTimetable can fit into your workflow.
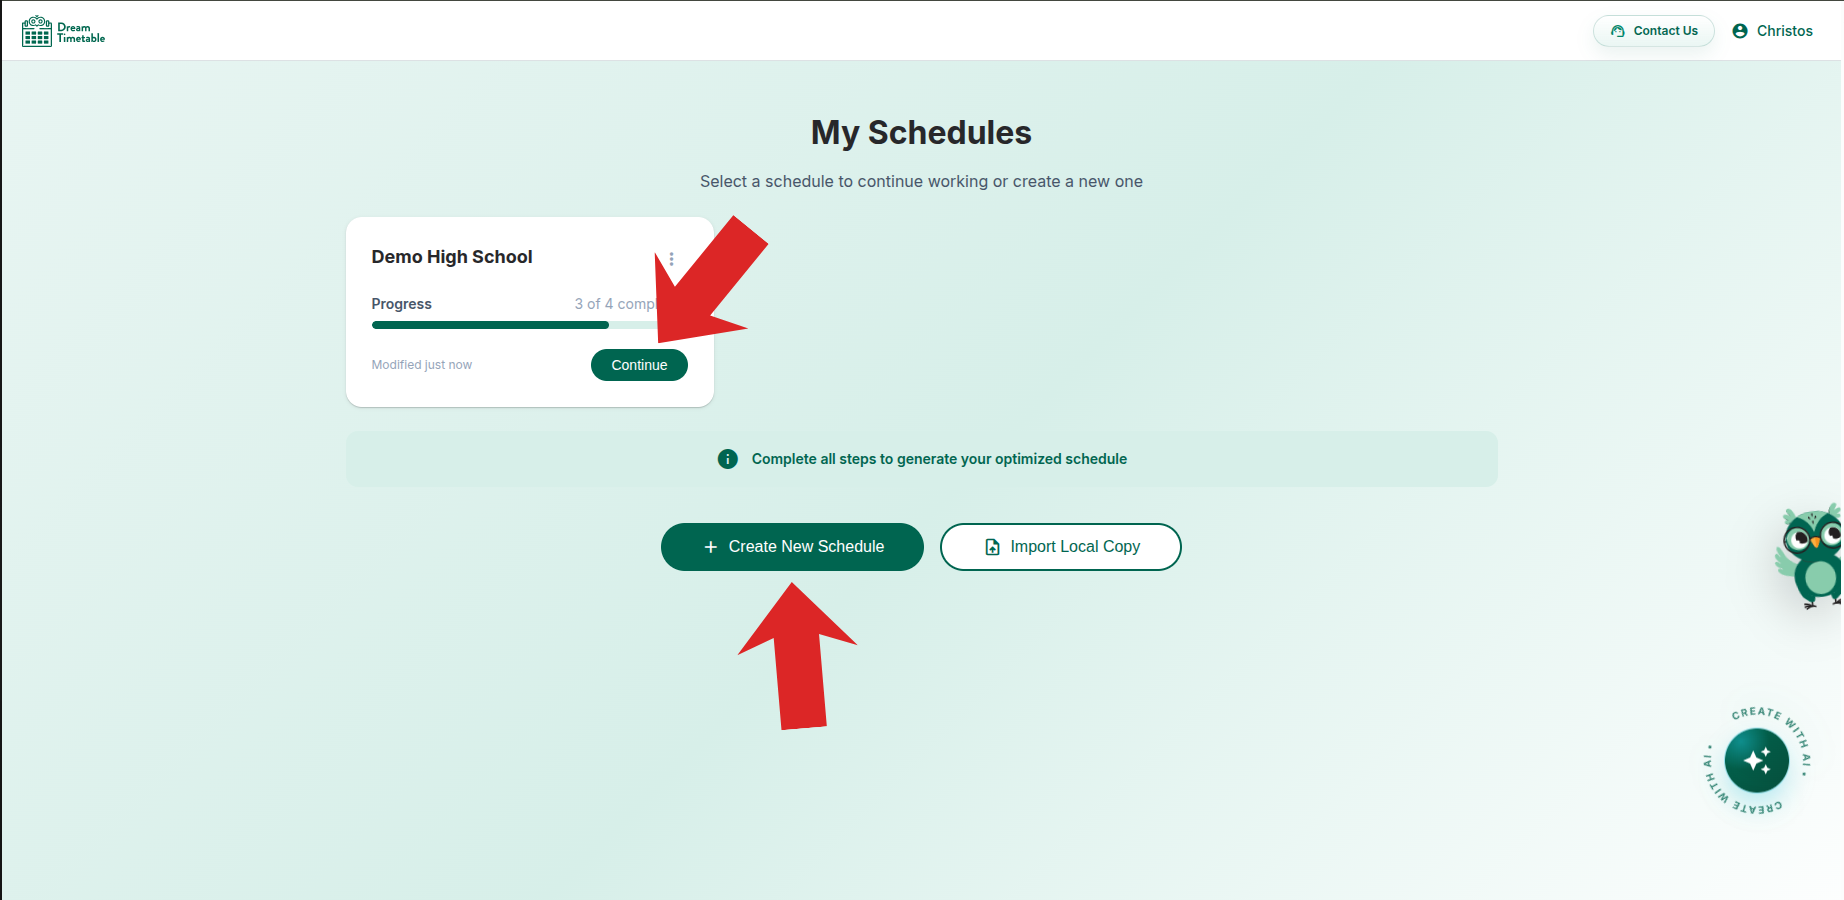
To start, go to the main page and either create a new schedule or press Continue on an existing one.
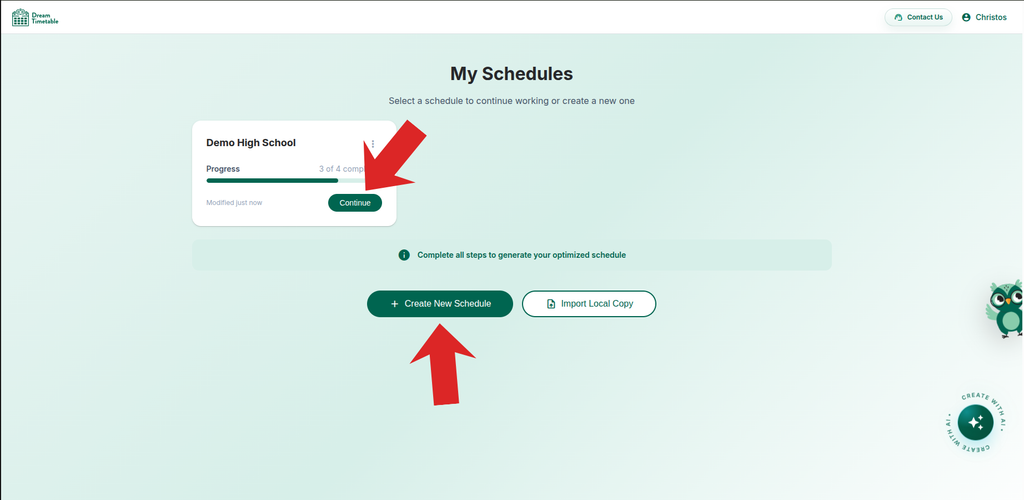
This is the dashboard. You won’t need to come here often, but it’s a useful place to check your progress and navigate between pages. Let’s start by navigating to the “Days & Periods” page.
Days & Periods Page
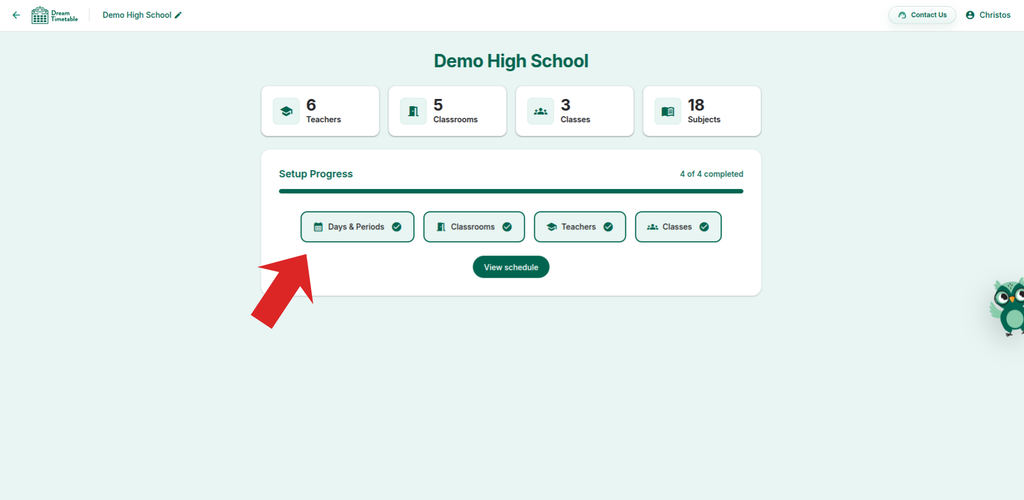
The “Days & Periods” page is where you define when exactly your school operates.
Choose “Periods” if your school operates in strict slots, each equaling one period. Choose “Real Time” if your school activities have varying durations (45 min, 1 hour, etc.), this is often the option of choice for elementary schools. You can always come back and change this later, so don’t worry about getting it wrong now.
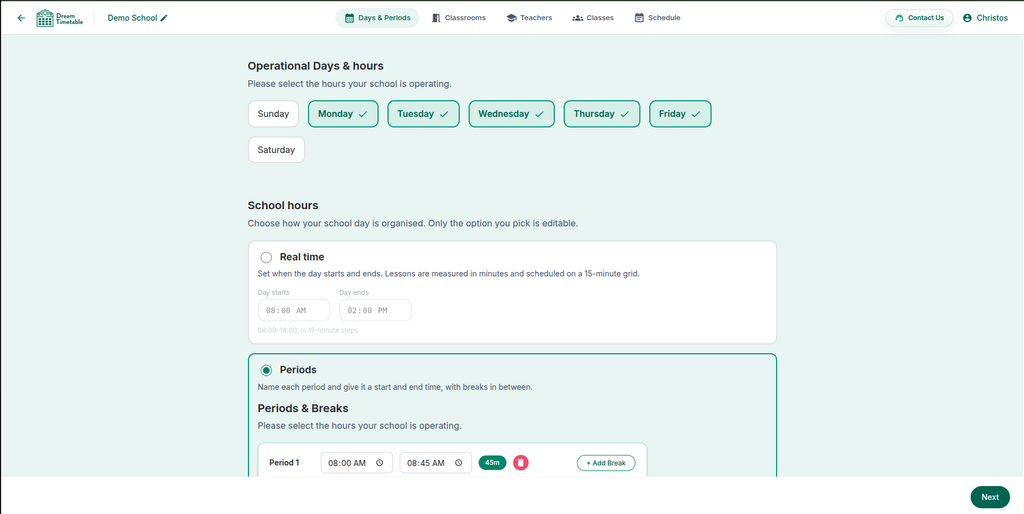
Some schools use a rotating schedule instead of the standard Monday–Friday system. To accommodate this, we allow you to rename days — for example, to numbers: Monday → 1, Tuesday → 2, and so on. To rename a day, just right-click on it.
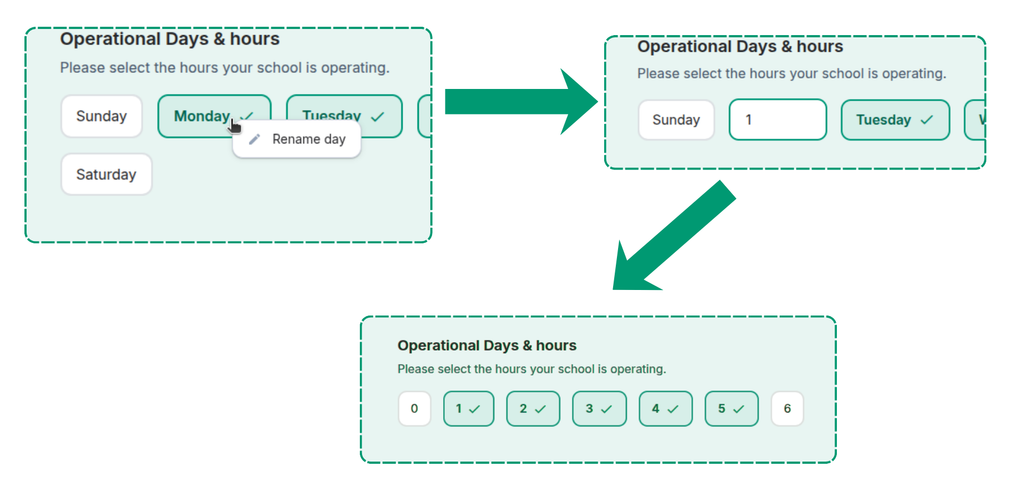
When you’re satisfied with your input, click Next to continue.
Classrooms Page
The “Classrooms” page is where you define the rooms available to your school — either physical rooms, or digital meeting rooms if you run a digital school. Either way, our smart algorithm will make sure two activities are never scheduled in the same room at the same time.
If each teacher has their own classroom and you don’t want to be bothered with assigning rooms, you can toggle this off entirely and continue to the next step.
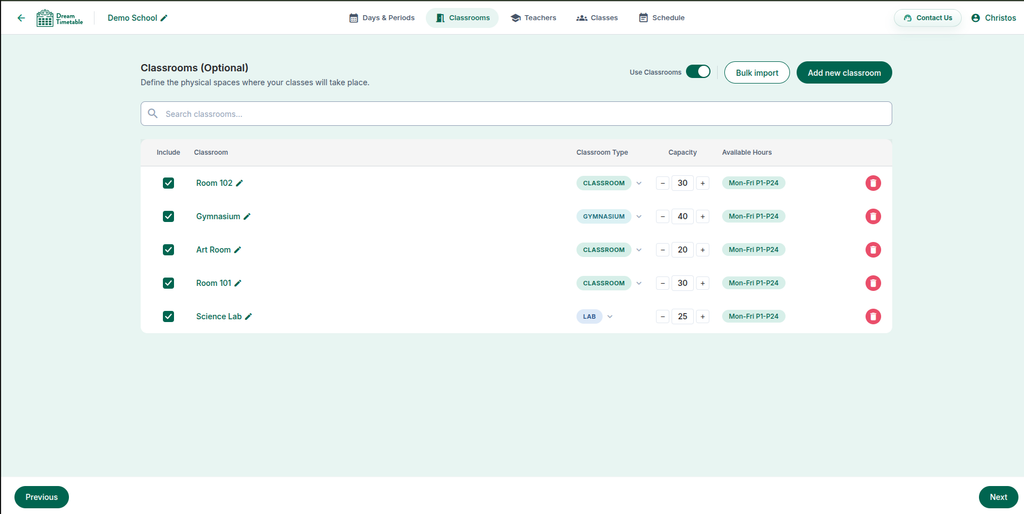
When adding a new classroom, you can define its type, capacity, and availability:
- Classroom type lets our algorithm match activities to the appropriate rooms. For example, you can define a room as “Lab,” and only lab activities will be scheduled there.
- Capacity helps you avoid overcrowding a classroom — we’ll place activities in rooms based on the number of participants.
- Available Hours is where you define when each room is (or isn’t) available. If left as is, each room inherits your school’s operating hours.
Teachers Page
The next step is inputting your teachers on the “Teachers” page.
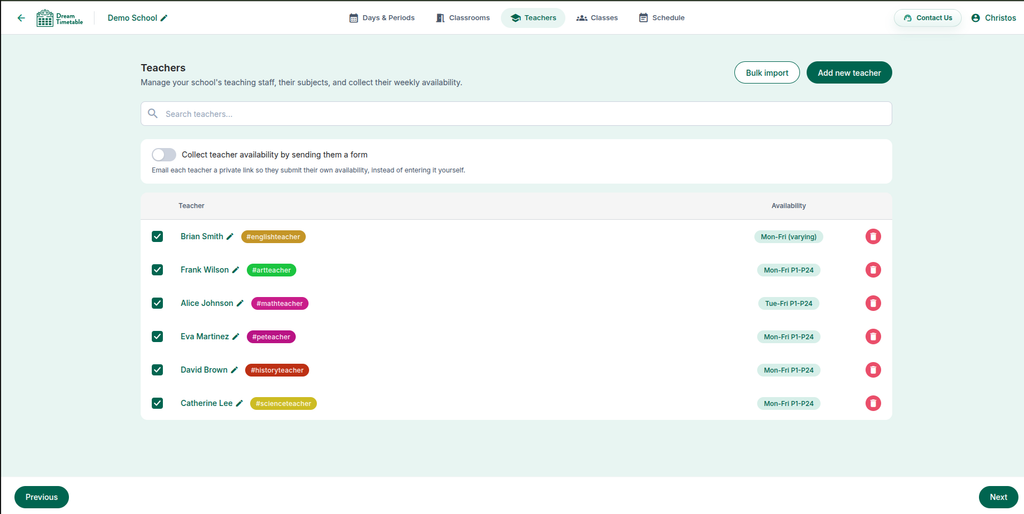
You can uncheck a teacher to exclude them from scheduling.
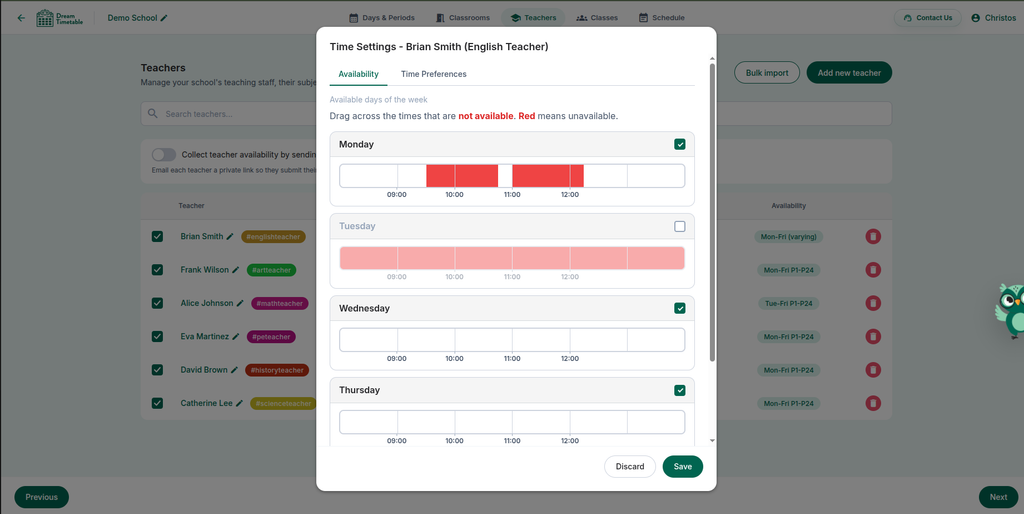
You can also define teacher availability the same way as with classrooms — just click the icon in the row of the teacher you want to specify. By default, teacher availability matches your school’s operating hours.
The next and last step is defining your classes and cohorts, and assigning them subjects and teachers, on the “Classes” page.
Classes Page
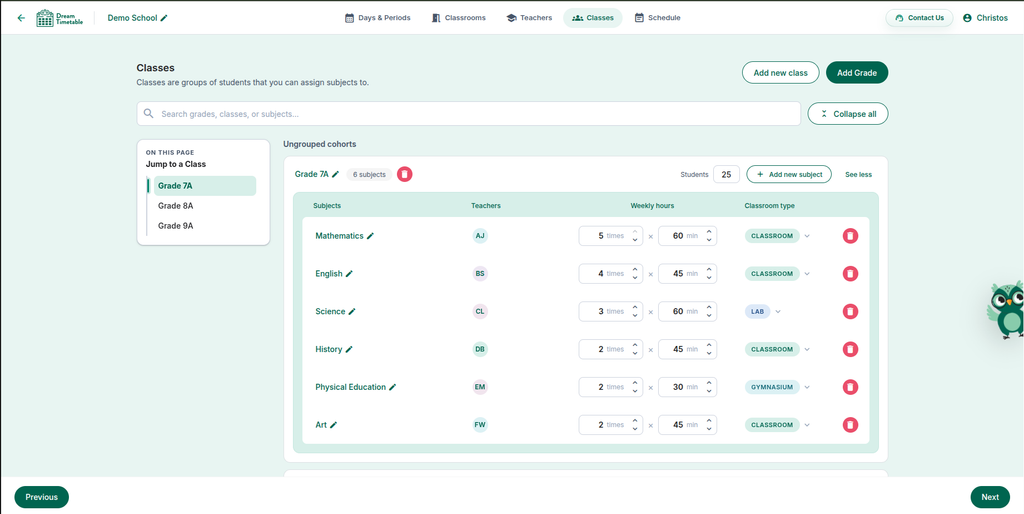
Add a new class by pressing the “Add new class” button. You’ll be prompted to give it a name, a number of students, and optionally the subjects taught, separated by commas.
For example: 7A, 25 students, subjects: Mathematics, English, Science, History, PE, Art.
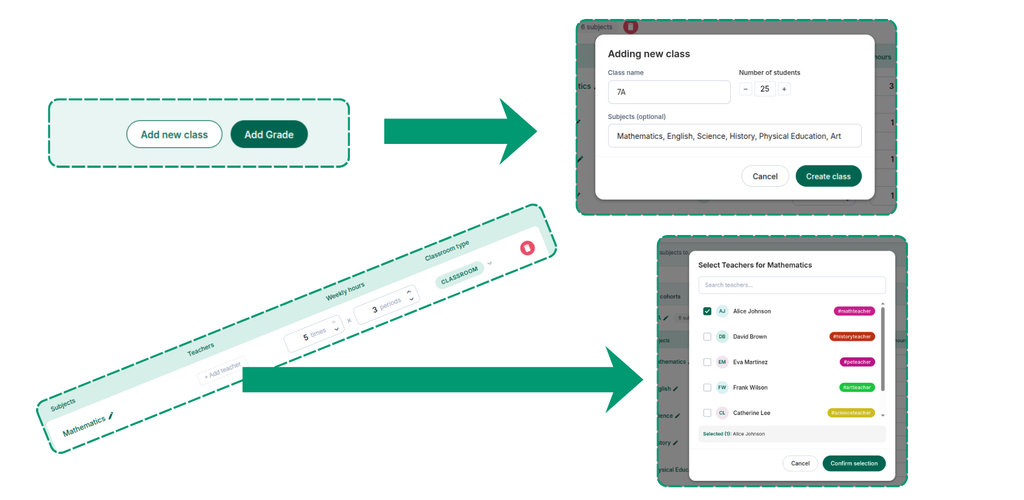
Next, click the “Add Teacher” option under each subject to assign one or more teachers. If you assign more than one, our smart algorithm will make sure all of them are available whenever that subject is scheduled.
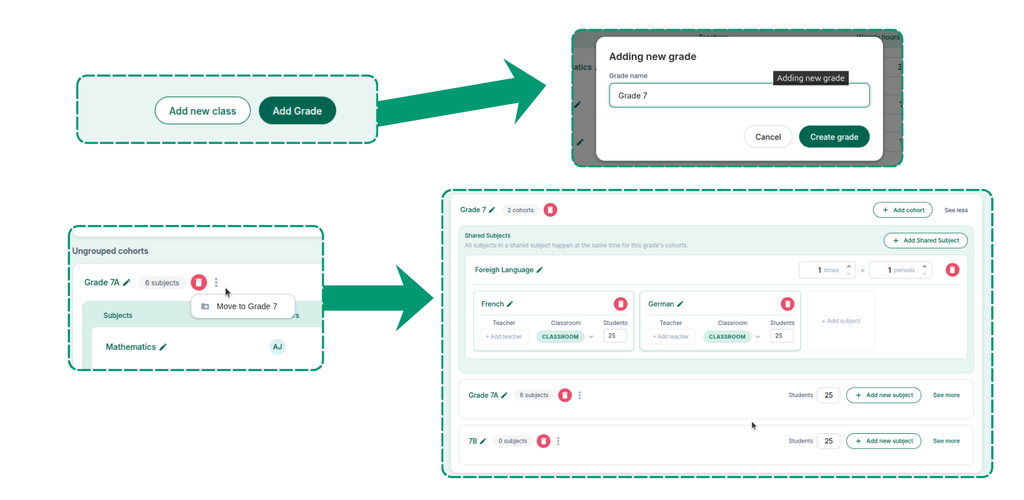
If you have subjects shared across multiple classes or cohorts (like foreign languages), try creating a grade using the “Add Grade” button. Inside a grade, you can define shared subjects with the “Add Shared Subject” button.
Schedule Page
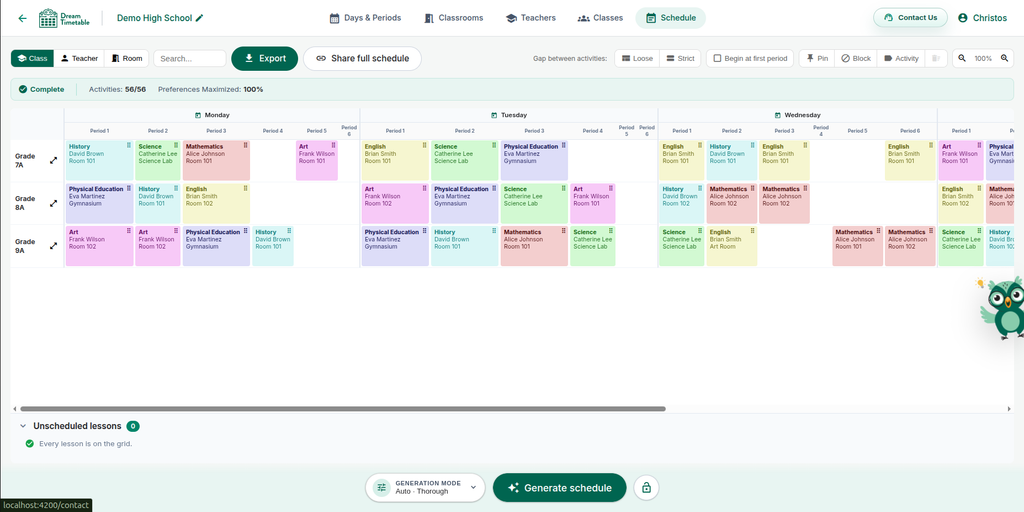
Now that you’ve entered all your data, it’s time to build your schedule. On the Schedule page, you’ll see a screen like the one below.
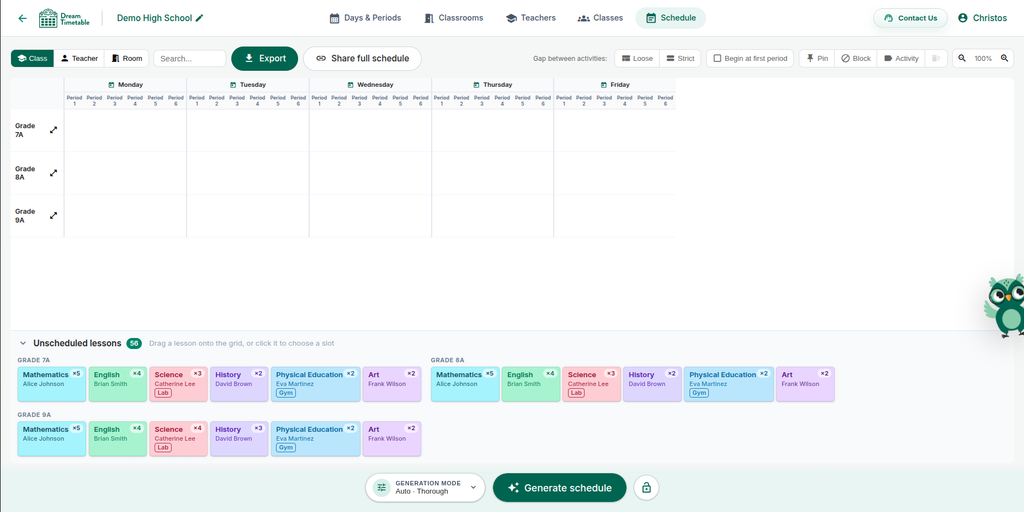
The two main components you’ll notice are an empty grid and a tray containing all your defined activities, presented as cards grouped by class or cohort.
There are two main ways to build your schedule in DreamTimetable: drag-and-drop, and the “Generate schedule” button.
Pressing Generate tells our smart scheduler to place all your activities on the grid without creating conflicts — whether with teacher availability, classroom availability, or custom constraints you’ve defined. We currently support two solvers, “Preferences” and “Complete,” which can be used interchangeably. For now, we recommend leaving this set to “Auto.”
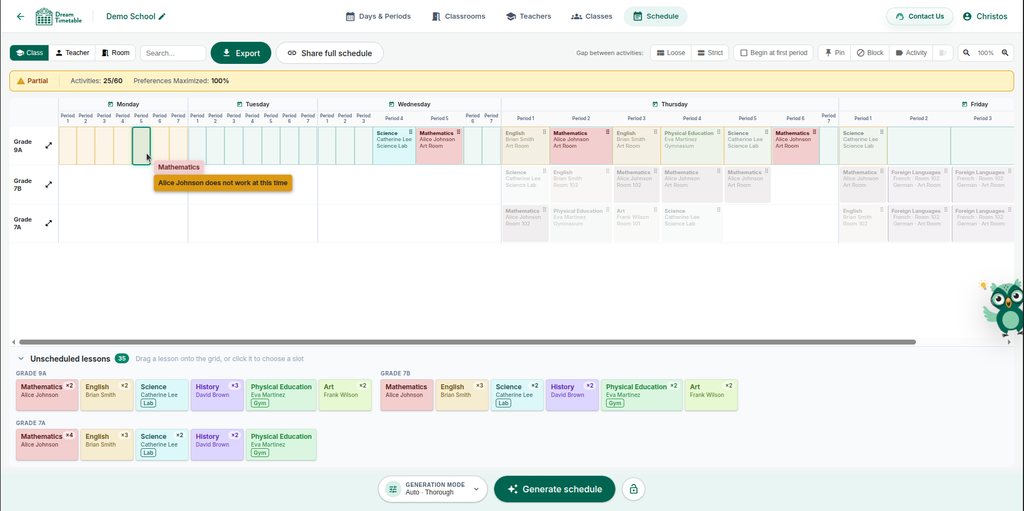
When you try moving an activity around, you’ll notice green slots and yellow slots lighting up. Green means no conflicts; yellow means the slot conflicts with an existing placement.
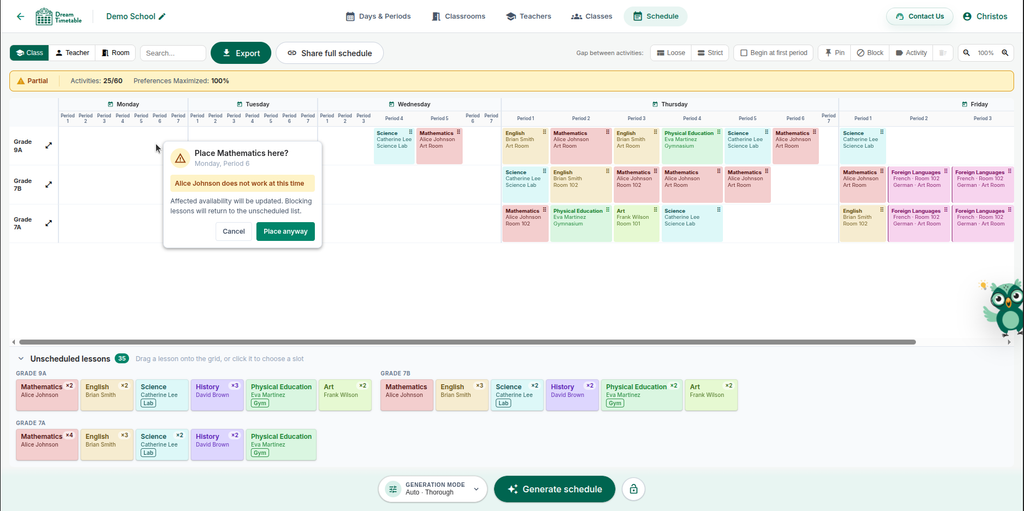
If you try placing an activity in a yellow slot, our conflict resolver will step in. You can either accept the proposed change or cancel it.
To avoid feeling overwhelmed, you can start by placing activities manually and use the Generate function as a supplement, or generate a first draft and then fine-tune it by editing manually. Either way, our smart algorithm makes sure no conflicts arise between entities.
Toolbar
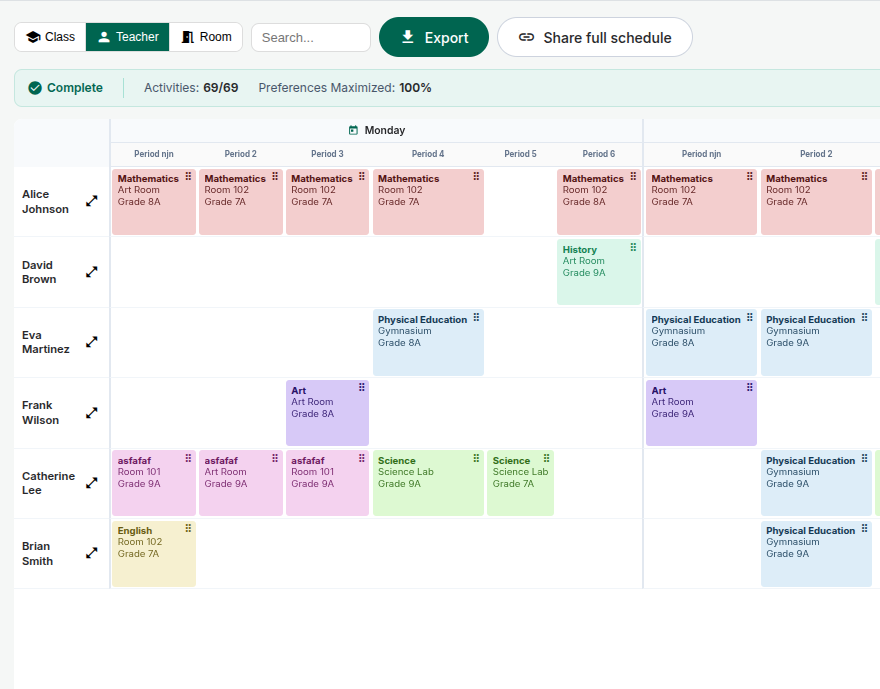
The toolbar gives you tools to view your schedule and control how generation works.

View
Switching views lets you look at the schedule from the perspective of classes, teachers or classrooms.
‘Gaps between subjects’ and ‘Begin at first period’
By setting “Gap between activities” to loose or strict, you make all activities sit next to each other without gaps — except if a constraint prevents it (like all teachers being unavailable for that period).

Clicking “Begin at first period” sets the first activity of each day to start at the first period. Combined with the no-gap option, this constrains the algorithm to generate a schedule that closely resembles a traditional school day.
Keep in mind that you’ll need to generate the schedule again for these changes to take effect.
Blocks, Pins & Custom Activities
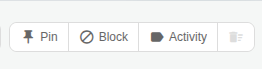
If you like a placement, you can pin it so it persists between generations.
If you want a slot to remain empty, use the block button — this automatically removes any existing placement in that slot.
If you want to place a custom activity, like a break or lunch, use the activity option, select the area on the grid to occupy, then set a name.
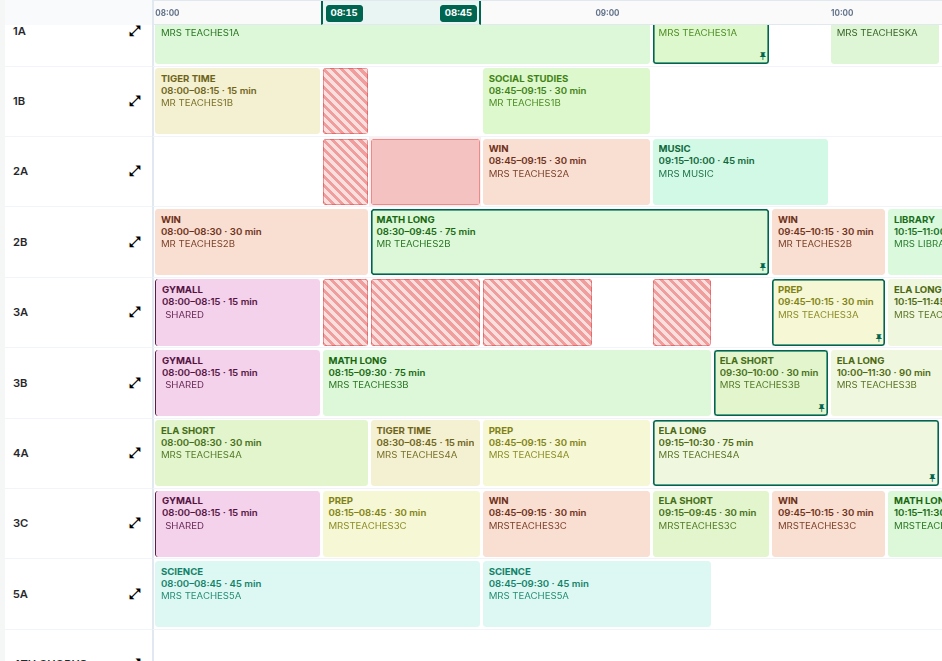
Pro tip: Blocks shown in the teacher or classroom grid views are the same thing as the constraints set on their respective pages — changing one effectively changes the other.
Wrapping Up
And that’s it — from an empty dashboard to a fully generated, conflict-free schedule. What used to take weeks of manual cross-checking now takes a fraction of the time, with DreamTimetable’s smart algorithm handling the heavy lifting of matching teachers, rooms, and constraints behind the scenes.
Of course, every school has its own quirks — rotating days, shared subjects across grades, last-minute cohort additions — and DreamTimetable is built to flex around all of them. The best way to see how it fits your school’s specific needs is to talk it through with someone who knows the tool inside and out.
Ready to see it in action for your school?
with one of our customer support specialists, and we’ll help you map DreamTimetable to your exact workflow.